[vc_row][vc_column][vc_single_image image=”1501″ img_size=”full” alignment=”center”][vc_column_text]
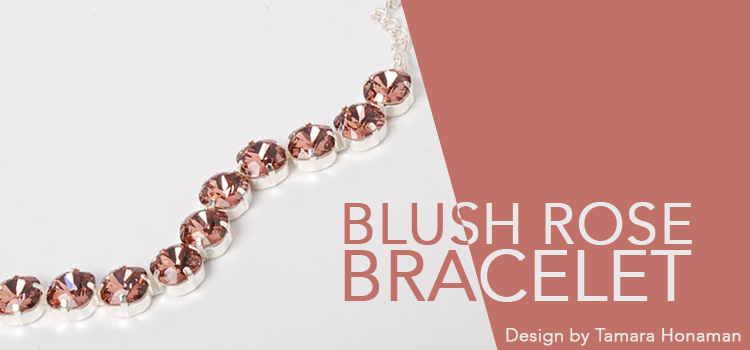
Soft hues of pink shimmer brilliantly in the Blush Rose Bracelet. The best part about this classy bracelet is that it’s so simple to create!
[/vc_column_text][/vc_column][/vc_row][vc_row][vc_column][vc_custom_heading text=”SUPPLIES” font_container=”tag:h2|font_size:32|text_align:center|color:%23c07168″ google_fonts=”font_family:Open%20Sans%3A300%2C300italic%2Cregular%2Citalic%2C600%2C600italic%2C700%2C700italic%2C800%2C800italic|font_style:700%20bold%20regular%3A700%3Anormal”][/vc_column][/vc_row][vc_row][vc_column][vc_column_text]
| PRODUCT GROUP | AMOUNT | SIZE | COLOR | PURCHASE |
|---|---|---|---|---|
| EMPTY CUP CHAIN BRACELET | 1 | 12 mm | SILVER | PURCHASE EMPTY CUP CHAIN BRACELET |
| SWAROVSKI SQUARE STONES | 10 | 12 mm | BLUSH ROSE | PURCHASE SWAROVSKI SQUARE STONES |
| PLIERS | 1 | PURCHASE TOOL KIT |
[/vc_column_text][/vc_column][/vc_row][vc_row][vc_column][vc_custom_heading text=”CREATING THE BLUSH ROSE BRACELET” font_container=”tag:h2|font_size:32|text_align:center|color:%23c07168″ google_fonts=”font_family:Open%20Sans%3A300%2C300italic%2Cregular%2Citalic%2C600%2C600italic%2C700%2C700italic%2C800%2C800italic|font_style:700%20bold%20regular%3A700%3Anormal”][/vc_column][/vc_row][vc_row][vc_column][vc_column_text]
Step One: Place one Swarovski crystal 4470 square rhinestone cushion cut 12mm blush rose fancy stone into the cup chain setting.
[/vc_column_text][/vc_column][/vc_row][vc_row][vc_column][vc_single_image image=”590″ img_size=”full” alignment=”center”][/vc_column][/vc_row][vc_row][vc_column][vc_column_text]
Step Two: Using the side of the tips of your pliers or the smooth side of a similar tool, press one prong in the cup chain setting down toward the Swarovski crystal.
[/vc_column_text][/vc_column][/vc_row][vc_row][vc_column][vc_single_image image=”591″ img_size=”full” alignment=”center”][/vc_column][/vc_row][vc_row][vc_column][vc_column_text]
Step Three: Repeat Step Two on the opposite side of the Swarovski crystal.
*TIP: When setting a stone it is advisable to set a prong then set the opposing prong rather than the prong over. As an example, with the prongs representing numbers on a clock; set the prong at 12:00 and then the prong at 6:00. Move clockwise around the setting to the next prong over from the first set prong, i.e. 3:00, then set the prong at 9:00. This method will help you set the stone centered and straight.[/vc_column_text][/vc_column][/vc_row][vc_row][vc_column][vc_single_image image=”592″ img_size=”full” alignment=”center”][/vc_column][/vc_row][vc_row][vc_column][vc_column_text]
Step Four: Repeat Step Two to press another prong toward the stone. Then press the remaining prong into place.
[/vc_column_text][/vc_column][/vc_row][vc_row][vc_column][vc_single_image image=”593″ img_size=”full” alignment=”center”][/vc_column][/vc_row][vc_row][vc_column][vc_column_text]Design by Tamara Honaman.[/vc_column_text][/vc_column][/vc_row] квартира через ипотеку


